Google Analytics is infamously complicated, which tends to put many website owners off implementing anything other than the basic default settings. When we first started learning it as a team, we began to wonder if we would ever figure it all out. After much frustration, digesting numerous help articles, and purchasing an expensive training course, we are now glad to say that we’re here to help make your journey much less painful than ours was.
While we don’t claim to be the biggest experts on Google Analytics, we can claim that we’ve worked very hard to implement it for our clients, and we can’t wait to share what we’ve discovered with you. We hope you get as excited as we did when it all finally clicks into place and Google Analytics starts tracking events on your site!
What is Google Analytics and What does it do?
Google Analytics, or GA4, is a tool which helps you monitor, record, understand, measure, compare, and analyse what visitors are doing on your website. Other than knowing exactly what search terms (keywords) people have searched for in order to arrive on your website, pretty much everything website-related can be analysed with Google Analytics. If you’re wondering how to view the keywords searched for and whether or not they lead to clicks and visits, this data is available in another Google marketing tool which can be linked to Google Analytics for data sharing – Google Search Console.
With GA4, you can collect numerous different types of data, from what visitors do on the page, to how they progress through your website. With GA4, you can collect a wide range of data, from how visitors interact with your pages to how they move through your website. To enable this, you’ll need to install a small piece of JavaScript code. A developer can handle this for you, or if you’re using WordPress, you can simply install a plugin to make the process quick and simple. The plugins we normally use are Insert Headers and Footers or WP Code, but there are lots of other similar plugins you can choose from. If your website isn’t built on WordPress, there’s usually a spot in the CMS (the back-end area) where you can add your Google Analytics or Tag Manager tracking code. Many WordPress themes also have a similar option, often found in the Theme Settings.
The three main types of data you can track in your GA4 account are page views, events, and eCommerce purchases.
Page views show how many visitors each page on your website receives. This information is really helpful, as it gives you a clear idea of what your audience is most interested in, so you can tailor your content and marketing to match.
Events are recorded whenever someone interacts with your website, for example, when they submit a form, click a link, or play a video. You can customise these events to track the actions and insights that matter most to you.
For eCommerce websites, purchase events track all the data related to completed sales. GA4 can also show you which products were bought, your total revenue, and the average spend per customer.
Gathering all this data and trying to make sense of it on your own can feel pretty overwhelming. That’s why Google has built data processing and report generation right into Google Analytics.
User data is tied to each individual visitor on your site. When someone visits for the first time, GA4 creates a unique ID for them and when they return, GA4 recognises them.
Session data refers to what happens during each visit, for example, how long someone stays on your site and what they do while they’re there. Throughout each session, GA4 collects a variety of useful information to help you understand visitor behaviour.
All this data (and more if you choose) is then presented in a report, which offers a visual overview. These reports make it easy to spot patterns and gain clear insights into how visitors interact with your site.
What is Google Tag Manager and What does it do?
Google Tag Manager (known as GTM for short) makes life easier when working with Google Analytics. And how do we know? We’ve seen the results for ourselves.
With Google Tag Manager, you only need a single tracking code. Once it’s integrated into your site, you’re connected. A few years ago, you had to code each tag manually, but that’s no longer necessary. In fact, it’s so simple now that you don’t even need a developer, which makes the whole process much faster and easier.
Once the code is installed on your website, you can link GA4 and GTM by setting up a GA4 configuration tag in GTM. Just set the trigger to ‘All Pages’, hit submit, and you’re good to go. Easy! And the best part? It’s completely free.
In today’s world, where data protection is a priority, GTM makes compliance much easier. You can manage and control cookie consent directly in the platform, ensuring you respect your visitors’ preferences and avoid any pitfalls. We recommend checking out this article on how to set up cookie consent with Google Tag Manager.
Also see this introduction to GTM and why you should use Google Tag Manager.
What events does Google Analytics and Google Tag Manager Track?
See this guide about events in Google Analytics.
- Form submissions: Tracks users successfully completing forms, especially those with non-standard behavior or lacking thank-you page redirects.
- Button clicks: Monitors clicks on call-to-action buttons or other interactive elements beyond basic links.
- Video engagement: Tracks user interactions on embedded videos, such as play, pause, or completed at certain time thresholds.
- Scroll depth: Measures how far users scroll down on a page, indicating their level of engagement and interest with the content.
- Downloads: Tracks file downloads, providing insights into content consumption and lead generation.
- E-commerce actions: Tracking crucial steps in the purchase journey like adding items to a cart, initiating checkout, or completing a purchase.
How to set up Google Analytics
Follow these simple easy steps to set up Google Analytics tracking on your site, also see this guide on how to set up Google Analytics:
Step 1: Go to Google Analytics
To set up Google Analytics go to https://analytics.google.com/. Click the blue Start measuring button.
Step 2: Create an Account
Enter the website name into the account name field and then scroll down and click Next.
Step 3: Create a Property
Enter the property name, which is the same as the account name followed by ‘ – GA4’. Then check the Reporting time zone is set to the United Kingdom and the Currency is British pound. Then click Next.
Step 4: Describe Your Business
Select the Industry category and the Business size. Then click Next.
Step 5: Choose Your Business Objectives
Select the business objectives that are most relevant to you, a maximum of two is recommended. Then click Create. You will then need to accept the Google Analytics Terms of Service Agreement and the Data Processing Terms as required by GDPR.
Step 6: Set up a Data Stream
To set up a data stream for your website, select the Web platform and then enter the URL of your website in the Website URL field and the Stream name field. Then click Create and continue.
Step 7: How to Install Google Analytics on Your Website
To set up a Google tag click the copy button in the top right of the tracking code box and then add this tracking code to your site. Ensure it is set to appear in the head tag of every page on your website. For WordPress websites we recommend using plugins such as: Insert Headers and Footers or WP Code. Then click the close button towards the top left and after that click Next and then click Continue to Home.
Step 8: View the Total Page Views on Your Site
To see the total Page views on your site in GA4, go to Reports, Business objectives, View user engagement and retention, Pages and screens. If this produces a no data available message then it means that since you’ve only just set up Google Analytics, you’ll need to wait a few days for data to appear. Also ensure the tracking code is set up properly, see this troubleshooting guide.
How to Create a Custom Event in Google Analytics
See this guide on custom events in Google Analytics and also see this google help article on how to create or modify key events in Google Analytics.
Step 1: Go to the Admin Section
Click the Admin button in the bottom left corner, then go to Data display, Events. Then click the blue Create event button.
Step 2: Enter the details of the Event
Enter the name of the event in the Event name field, in this case we are creating an event called contact_form_submissions. The name of the event needs to contain no spaces, only contain lowercase letters and be 40 characters or less.
If this needs to be a key event click Mark as key event. Then lower down the page, in the Event name dropdown select form_submit, then enter the URL of the page with a form to be tracked in the URL field. In this example we are tracking a form on the /contact/ page. Then click the blue Create button in the top right. The event only appears in GA4 when data has been tracked by the event, so you will need to wait a few days for data to appear.
How to set up Google Tag Manager
See this google help article on how to set up Google Tag Manager and how to set up Google tags in Google Tag Manager.
Step 1: Go to Google Tag Manager
Go to https://tagmanager.google.com/ and click the blue Create Account button.
Step 2: Enter the Account Details
In the account name field enter the name of your website and in the Container name field enter the URL of your website. For the target platform select Web. Then click the blue create button. Following that you will need to accept the Google Tag Manager Terms of Service Agreement.
Step 3: Add the Tracking Code to Your Website
To add the tracking code to your website click the copy button in the top right of the tracking code box and then add this tracking code to your site. Ensure it is set to appear in the head tag of every page on your website. For wordpress websites we recommend using plugins such as: Insert Headers and Footers or WP Code. Then click the close button.
Step 4: Copy the Measurement ID from Google Analytics
Go to Google Analytics, then click the Admin button in the bottom left corner. Then go to Data collection and modification, Data streams, then click on the Data stream. Following that click the copy button next to the Measurement ID.
Step 5: Create a Variable for the GA4 Measurement ID
Go back to Google Tag Manager. Then to create a variable for the GA4 measurement ID, go to the Variables section in the left panel. Then in the User Defined Variables section, click the blue New button. Then click the Variable Configuration box and in the Utilities section, select a Constant type. Then paste the GA4 measurement ID into the Value field. Following that enter the name of the variable in the ‘Untitled Variable’ field towards the top left. Then click the blue Save button in the top right.
Step 6: Add a Google Tag to GTM
To add a Google Tag to GTM go to the Tags section in the left panel. Then click the blue New button. Then click the Tag Configuration box and click Google Analytics, then select Google Tag. Following that enter the measurement ID variable into the Tag ID field. Then enter the name of the tag into the ‘Untitled Tag’ field towards the top left. Then click the Triggering box, and select the All pages trigger. After that click the Save button in the top right.
Step 7: Add a PDF Downloads Tag
To add a PDF downloads tag, click the blue New button. Then click the Tag Configuration box and click Google Analytics, then select ‘Google Analytics: GA4 Event’. Following that enter the measurement ID variable into the Measurement ID field. Then enter the name of the event in the Event Name field. The name of the event needs to contain no spaces, only contain lowercase letters and be 40 characters or less, in this case the event we are creating is called ‘pdf_downloads’. After that enter the name of the tag in the ‘Untitled Tag’ field towards the top left.
Step 8: Add a Trigger to the PDF Downloads Tag
To add a trigger to the PDF downloads tag, click the Triggering box, then click the blue plus icon in the top right to add a new trigger. Then click the Trigger Configuration box and select the trigger type, in this case we are going to use the ‘Just links’ trigger type in the Clicks section. Then select ‘Some Link Clicks’ and select the ‘Click URL’ variable, then ‘ends with’, ‘.pdf’, to track PDF downloads. Following that enter the name of the trigger in the ‘Untitled Trigger’ field towards the top left. Then click Save in the top right and then click Save again.
Step 9: Test the PDF downloads tag
To test the PDF downloads tag click the Preview button in the top right of GTM. Then in the new browser tab that opens, enter the URL of your website, then click the Connect button. For a better experience in testing GTM tags, install the Tag Assistant browser extension. In the browser tab that opens, download a PDF on your website and check if the event gets triggered in the ‘Tag assistant’ browser tab. If the tag doesn’t trigger then follow these troubleshooting steps.
Step 10: Submit the Changes to Your GTM Container
To submit the changes to your GTM container, go to the main GTM browser tab where you set up the GTM tags. Then click the Submit button in the top right, add a Version Name and a Version Description and then click the Publish button in the top right. Then click the Workspace tab towards the top left to add more tags.
How to Set up Custom Definitions in GA4
The main use of custom definitions in GA4 is to add extra data to various different events in GA4, the most common custom definitions are:
- page_location: Shows the URL of the pages an event was triggered on for all events.
- search_term: On the view_search_results event, shows a list of the search terms that users have searched for using your website’s search box.
- video_duration: Shows a list of the durations of videos for all video events.
- video_percent: Shows a list of the percentages of videos for all video events.
- video_provider: Shows a list of the video providers for all video events.
- video_title: Shows a list of the video titles for all video events.
- video_url: Shows a list of the video URLs for all video events.
For more information see this guide on custom definitions in GA4.
Step 1: Go to the Custom Definitions Setup Page in GA4
Click the Admin button in the bottom left corner. Then go to Data display, then custom definitions. Then click the blue ‘Create custom dimension’ button. In this example we will set up the page_location custom definition, so enter page_location into the Dimension name field and page_location into the Event parameter field. Then click the blue Save button in the top right corner.
Step 2: View the Data of Custom Definitions in GA4
To view the data of the custom definition in GA4 go to Reports, Business objectives, View user engagement and retention, Events. Click on an event and then scroll down to view the data of a custom definition on the event. The page_location custom definition will now show on all events for data from now on, it doesn’t apply to past data. You will need to wait a few days for new data before the page_location custom definition will show.
Why Do I Need Google Analytics and Google Tag Manager?
With GA4 data, you can make smarter marketing decisions, focusing on what works and dropping what doesn’t. You’ll see which channels drive the most traffic, where your visitors come from, and which sites refer to the most people, helping you fine-tune your strategy for the next quarter.
Visitor experience on your website is very crucial for turning them into customers. A slow site leads to frustration and lost sales. GA4 highlights page load times and overall site speed, so you can spot issues quickly and make improvements. Remember to check performance on both desktop and mobile as not all your visitors will be desktop users!
GA4 insights are incredibly useful for guiding you on your SEO strategy. The more you understand your audience, the easier it is to target the right products, keywords, and themes and start seeing real returns on your efforts.
Google Analytics FAQs
What is a Google Analytics Session?
A Google Analytics session is a period of time in which a user interacts with your website. It begins when a visitor arrives on your site and ends after 30 minutes of inactivity or when they leave your site. During this session, Google Analytics tracks all the actions that the user takes, such as viewing pages, clicking links, or completing goals. See this guide on GA4 sessions.
What is the Bounce Rate in Google Analytics?
The bounce rate in Google Analytics measures the percentage of visitors who land on a page on your website and then leave your site without visiting another page. It shows how many users arrived on your site, viewed a single page, and then exited your site without taking any other action such as clicking on a link, filling in a form, or navigating to another page. For more information see this guide on engagement rate and bounce rate in GA4.
What is Direct Traffic in Google Analytics?
Direct traffic in Google Analytics refers to the users visiting your website, with no identified referral source or tracking information. This means that Google Analytics cannot determine how the visitor arrived at your site, so GA4 labels the users as direct traffic. Typically, direct traffic occurs when a user types your website URL directly into their browser, bookmarks your page, or clicks on a saved link. However, it can also include visits where tracking data has been lost or is not passed through correctly. For more details see this guide on direct traffic in GA4.
What is Organic Search in Google Analytics?
Organic search in Google Analytics refers to website traffic coming directly from unpaid search engine results. When a user types a query into Google and clicks on a search result to visit your website, this visit is categorised as organic search traffic in GA4. It’s a key indicator of how well your website is performing in search engine rankings without relying on paid advertising. For more insights see this guide on organic search traffic report in GA4.
What does a Referral Mean in Google Analytics?
In Google Analytics a referral signifies a session where the user arrives on your website by clicking on a link from another website, which isn’t from a search engine or a direct visit. This could be a blog post, an article, a business directory, or any external site which links to a page on your site. The referral is recorded as the traffic source, and the website that sent the visitor to your site is known as the referring domain. See this guide on how to see Google Analytics referral traffic sources.
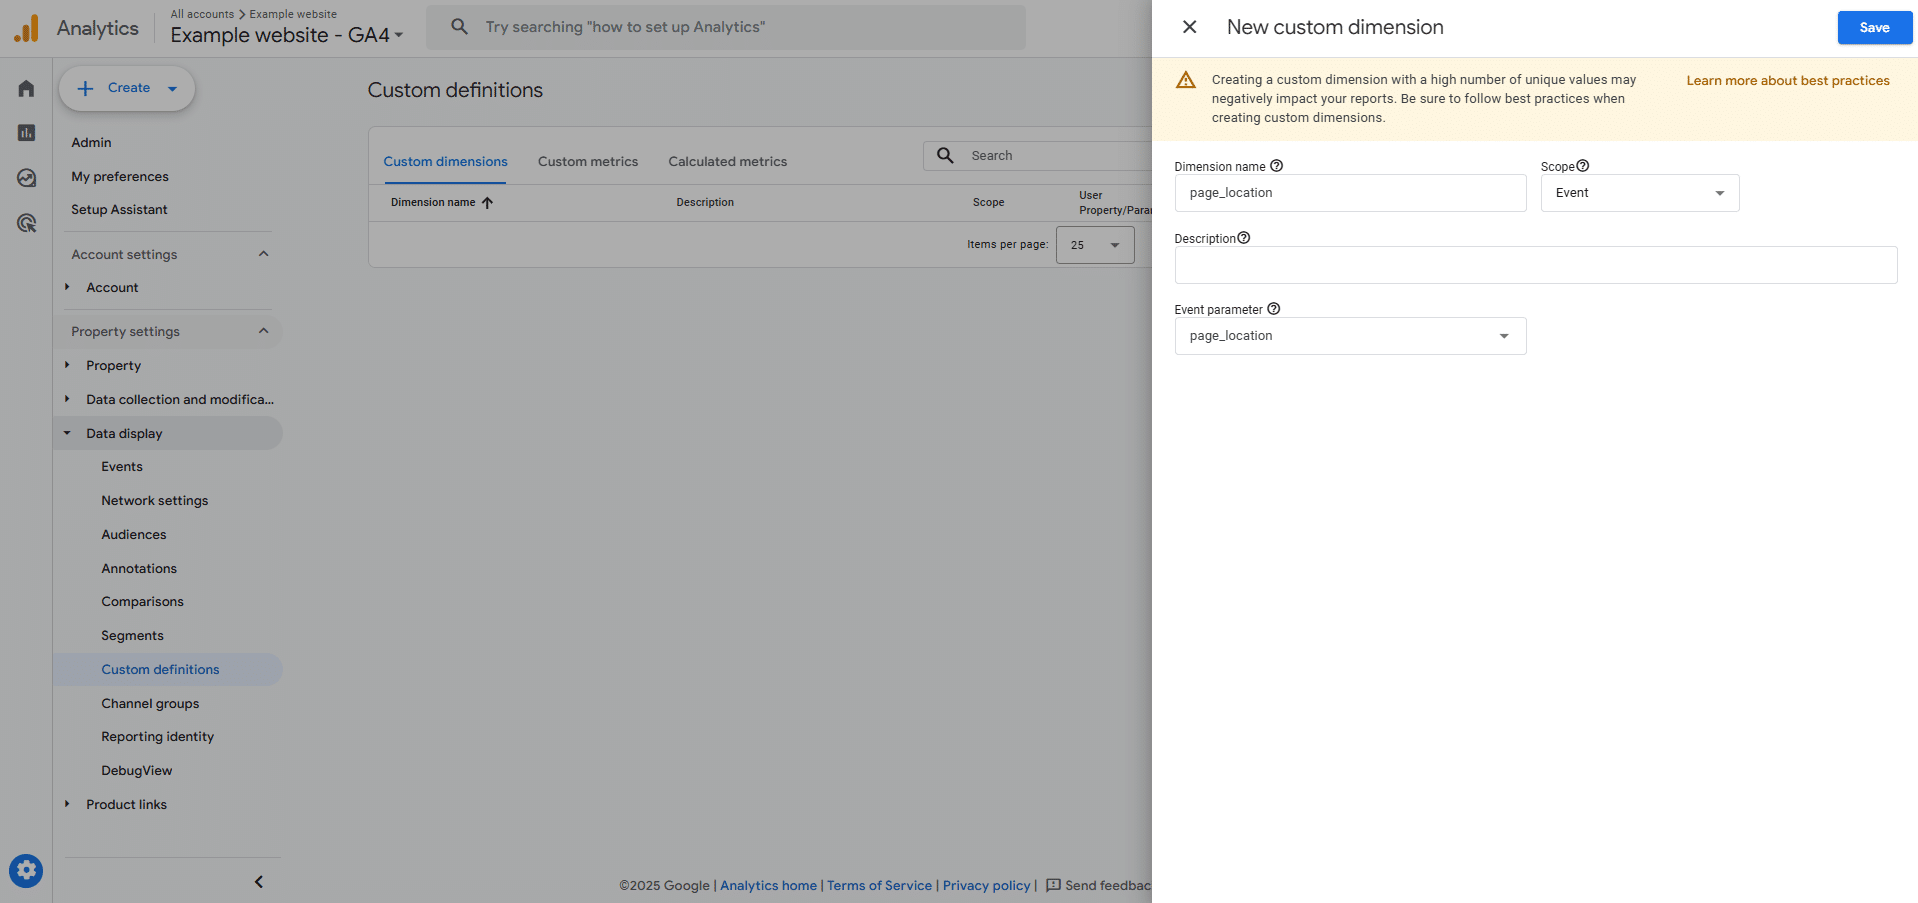
What is a Metric in Google Analytics?
In Google Analytics a metric is a quantitative measurement, representing a numerical value associated with user interactions on your website or app. Metrics provide insights into how users engage with your website, offering measurable data such as the number of sessions, total users, average engagement time, or the conversion rate. See more details about GA4 metrics.
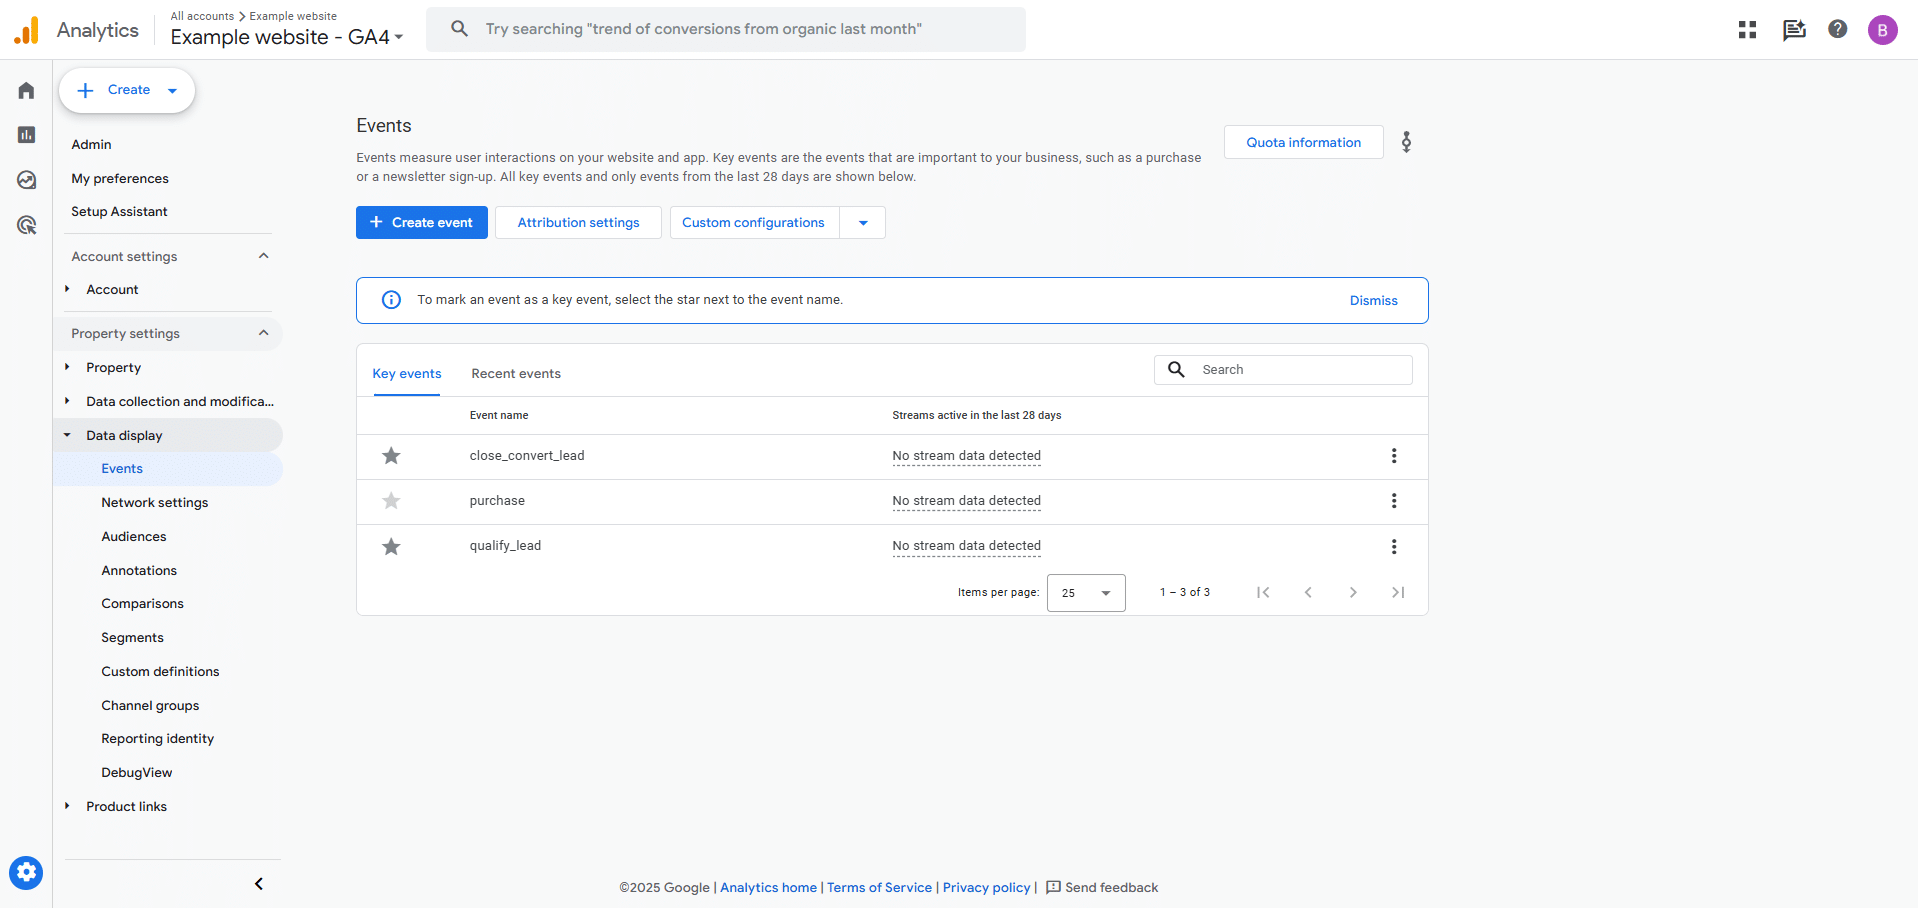
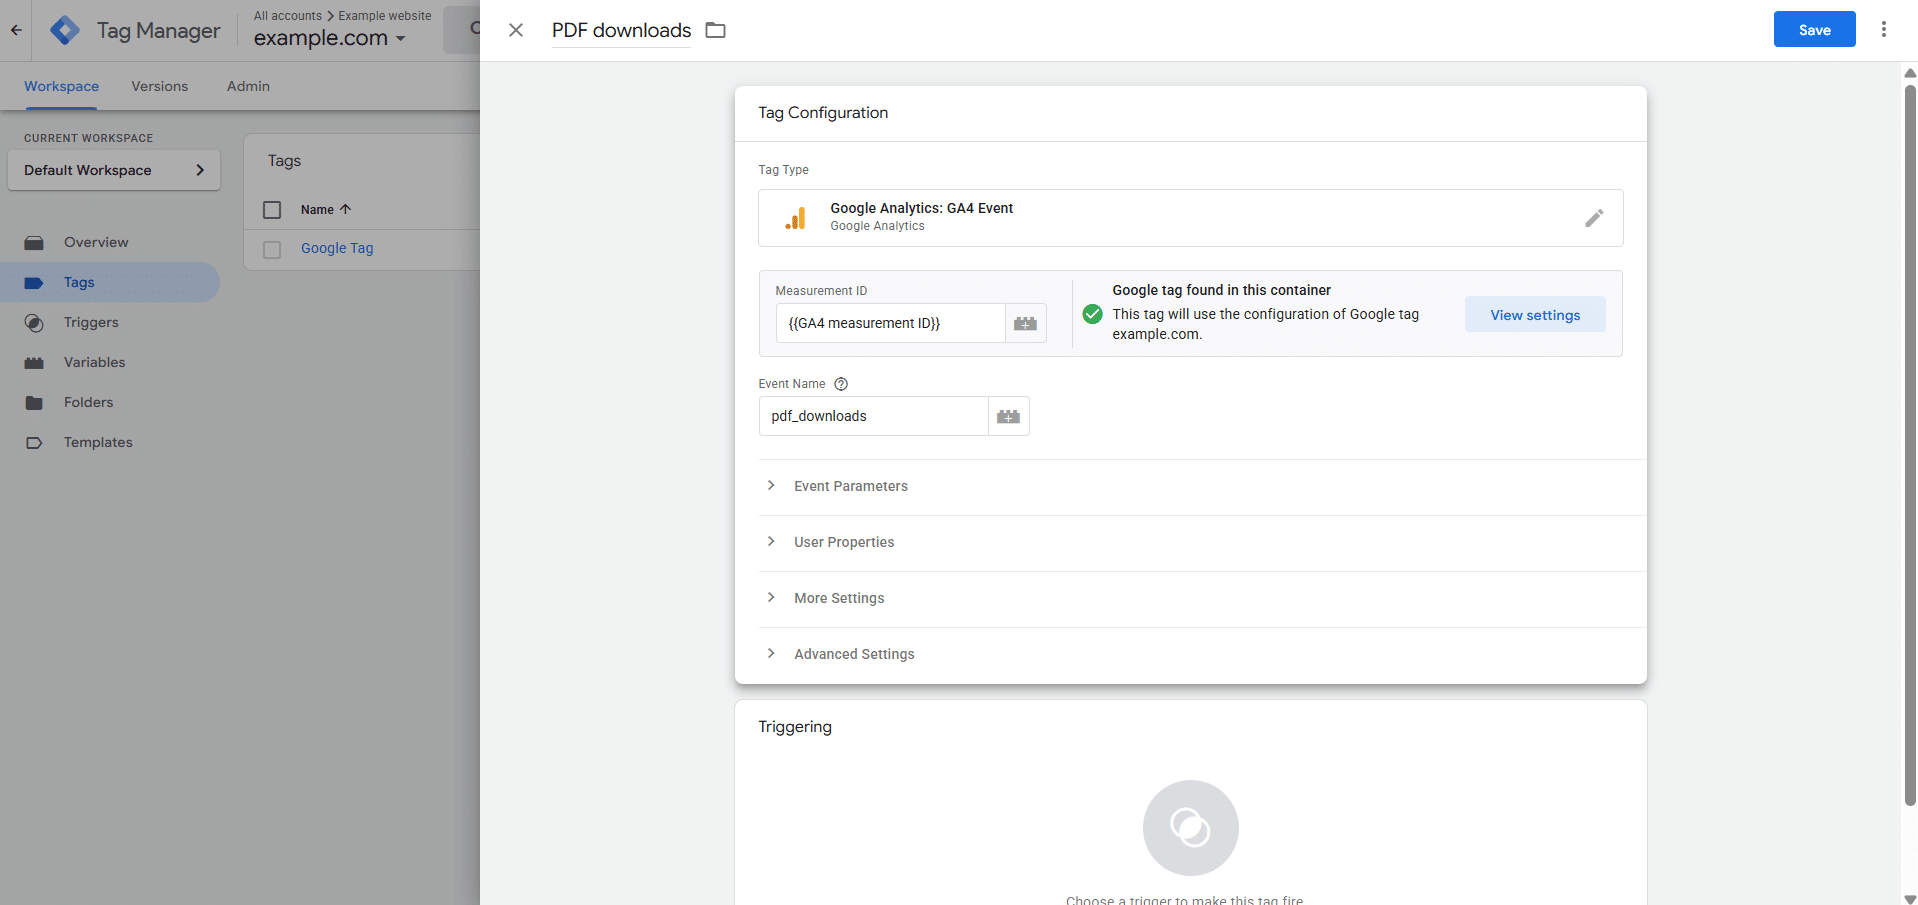
What is an Event in Google Analytics?
In Google Analytics, an event is any user interaction or activity which can be measured on your website. Events track specific actions, such as page views, button clicks, file downloads, form submissions, videos, or even custom interactions that you define yourself. Events are essential for understanding how users engage with your website, allowing you to track meaningful actions beyond user visits and page views. For more information see this guide about events in Google Analytics.
Google Tag Manager FAQs
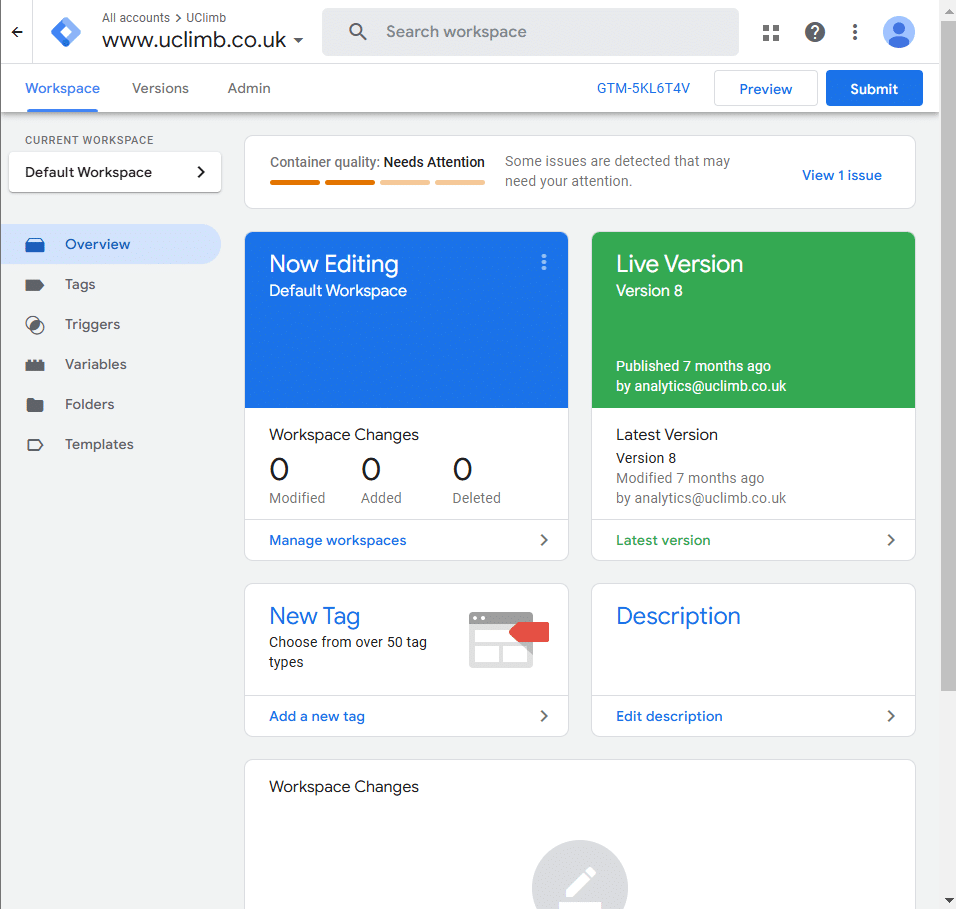
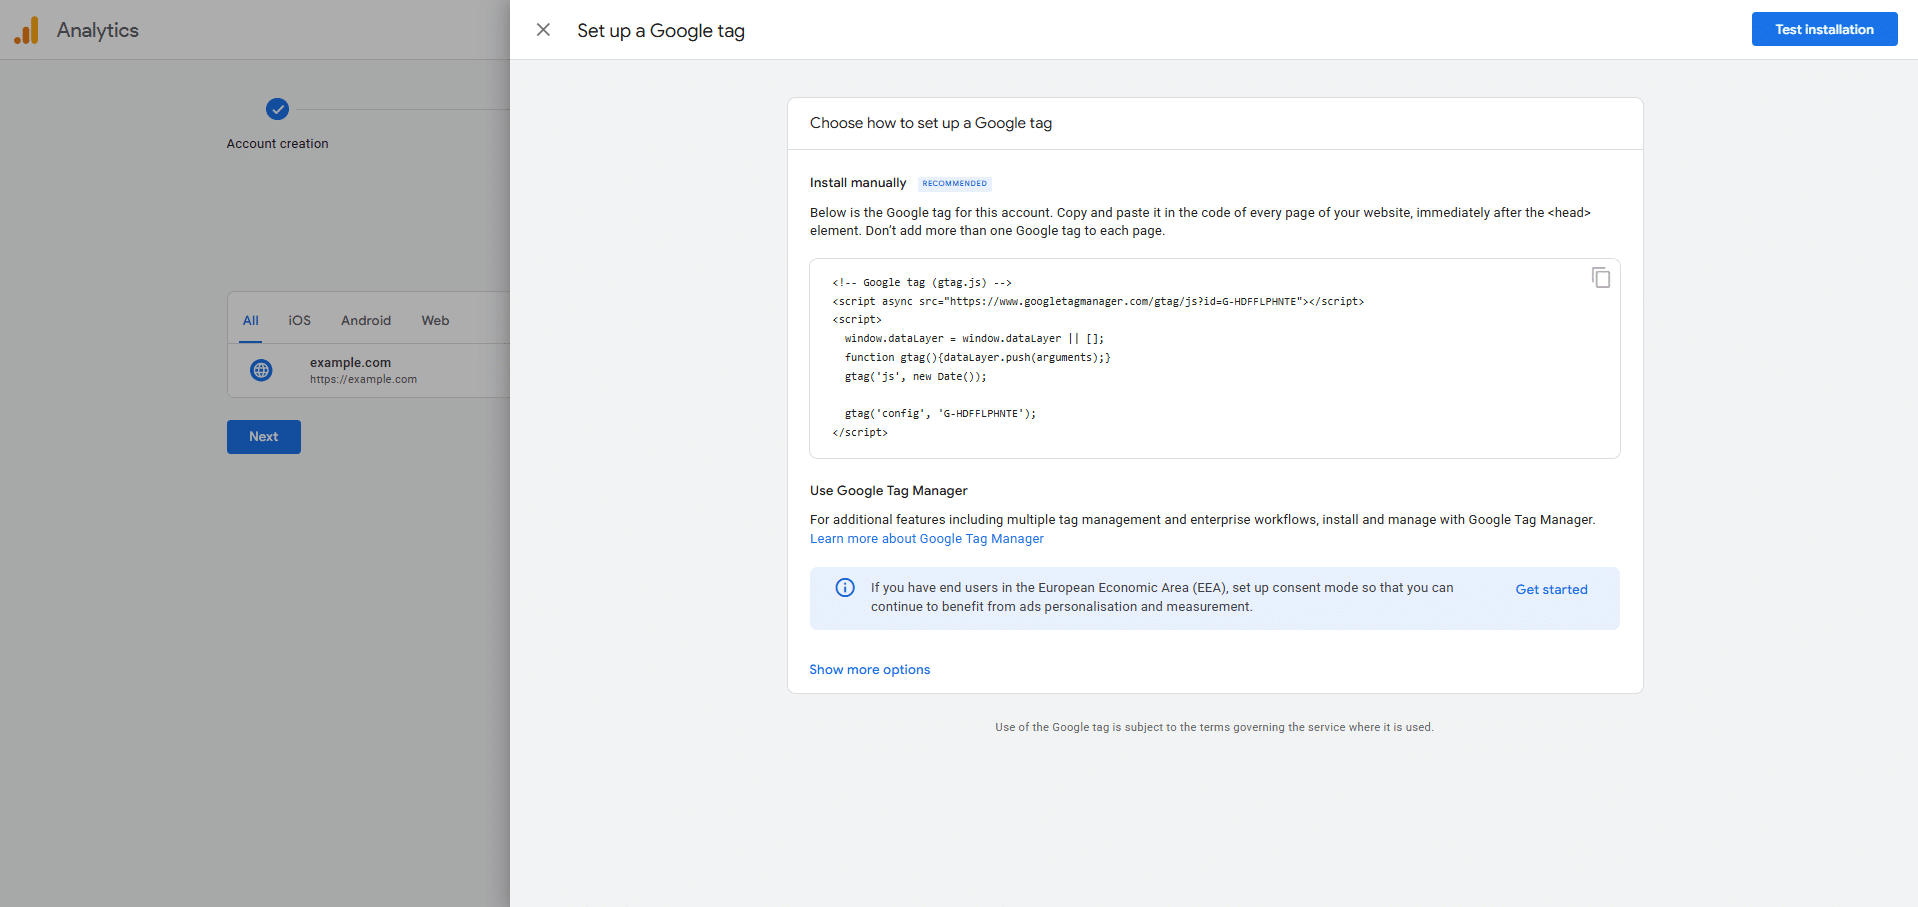
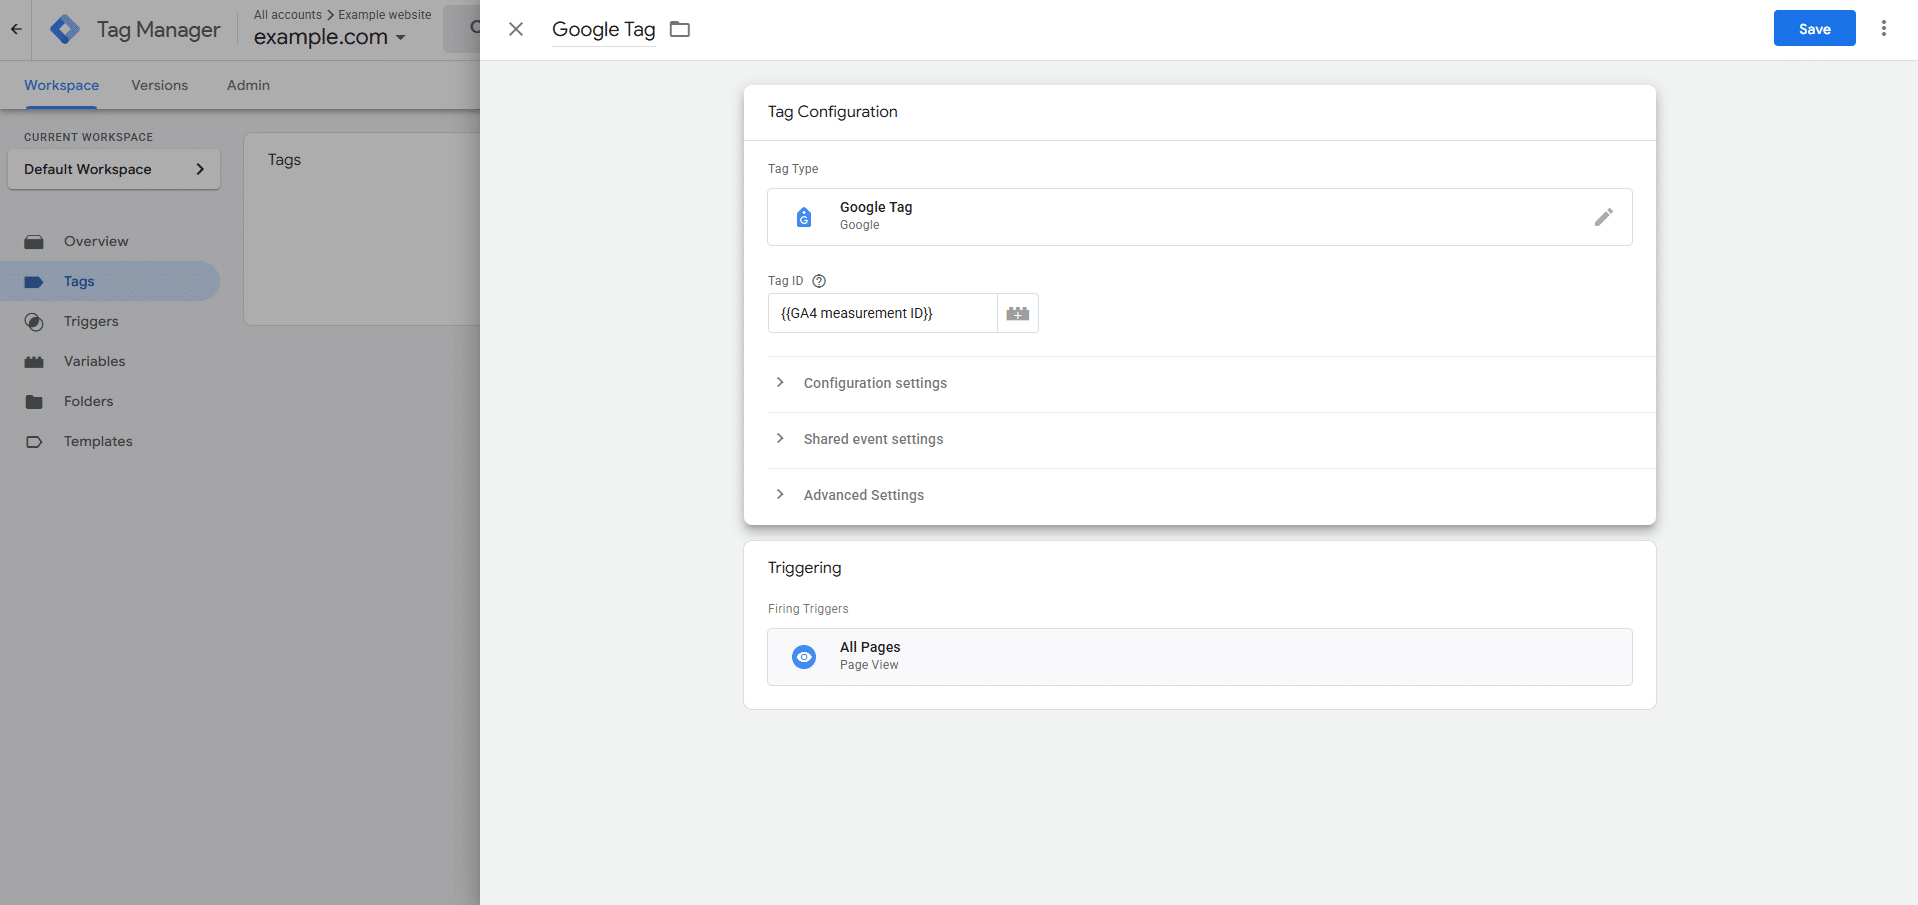
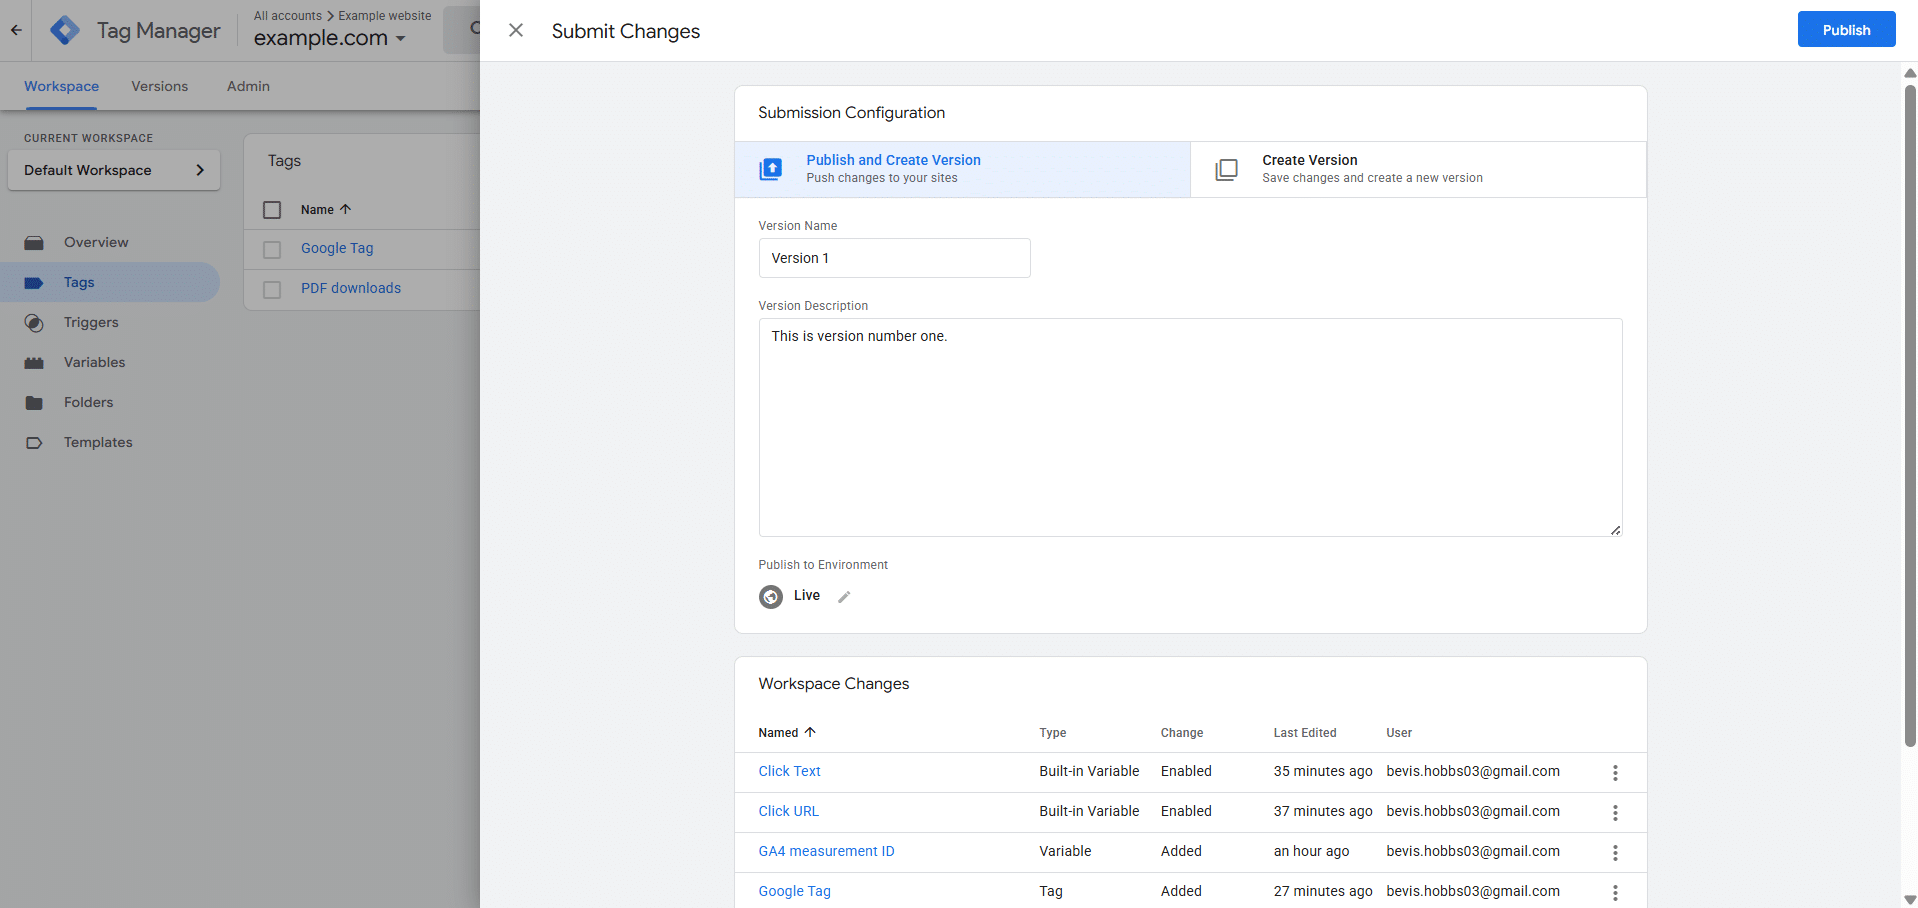
What is a Tag in Google Tag Manager?
A tag in the Google Tag Manager user interface is a tool which helps you track actions on your website and send useful information to platforms like Google Analytics, Google Ads, or other marketing and reporting systems. Tags allow you to measure activities such as page views, button clicks, form submissions, and other interactions which visitors do on your website. For more details see this google help article on tags in GTM.
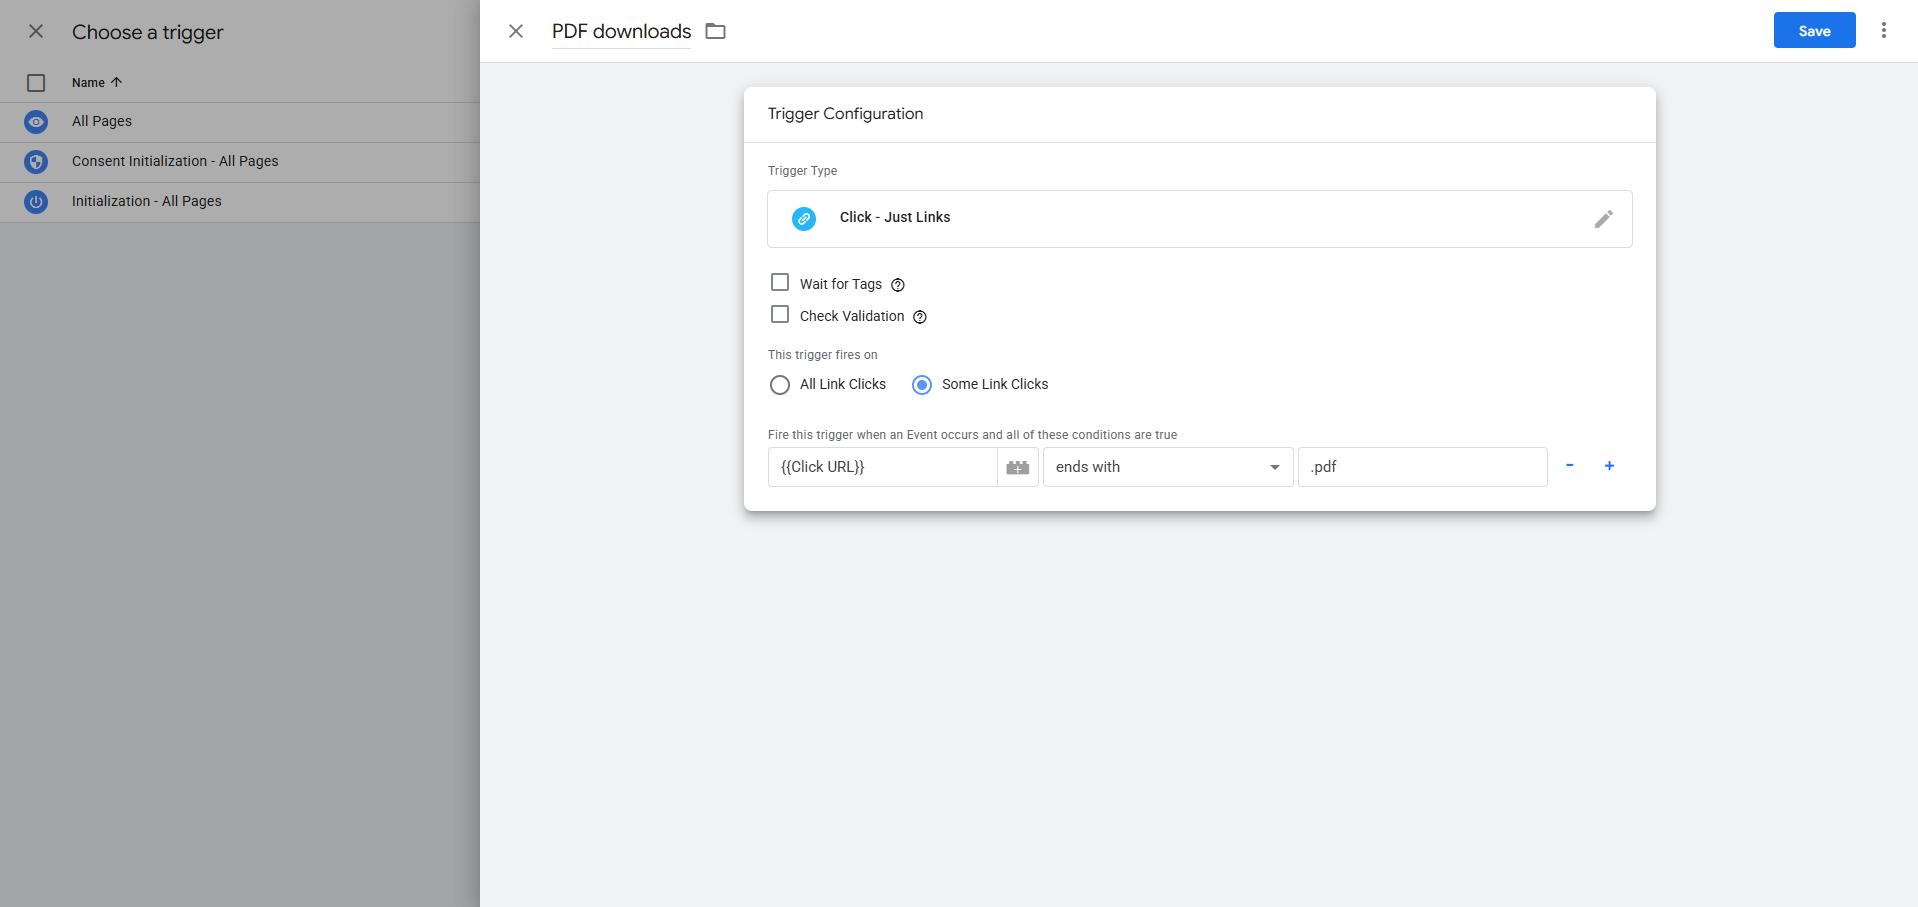
What is a Trigger in Google Tag Manager?
In Google Tag Manager a trigger is a set of conditions which determines when a tag should be activated. Triggers control when and under what circumstances a tag will run on your website. Without a trigger, a tag will not execute, regardless of how it has been configured. For example, you may want a Google Analytics tag to activate on every page load, a conversion tracking tag to run when a user submits a form, or a remarketing tag to load when someone views a specific product page. Each of these actions requires a different trigger to determine when the tag should operate. For more information see this Google help article about triggers in GTM.
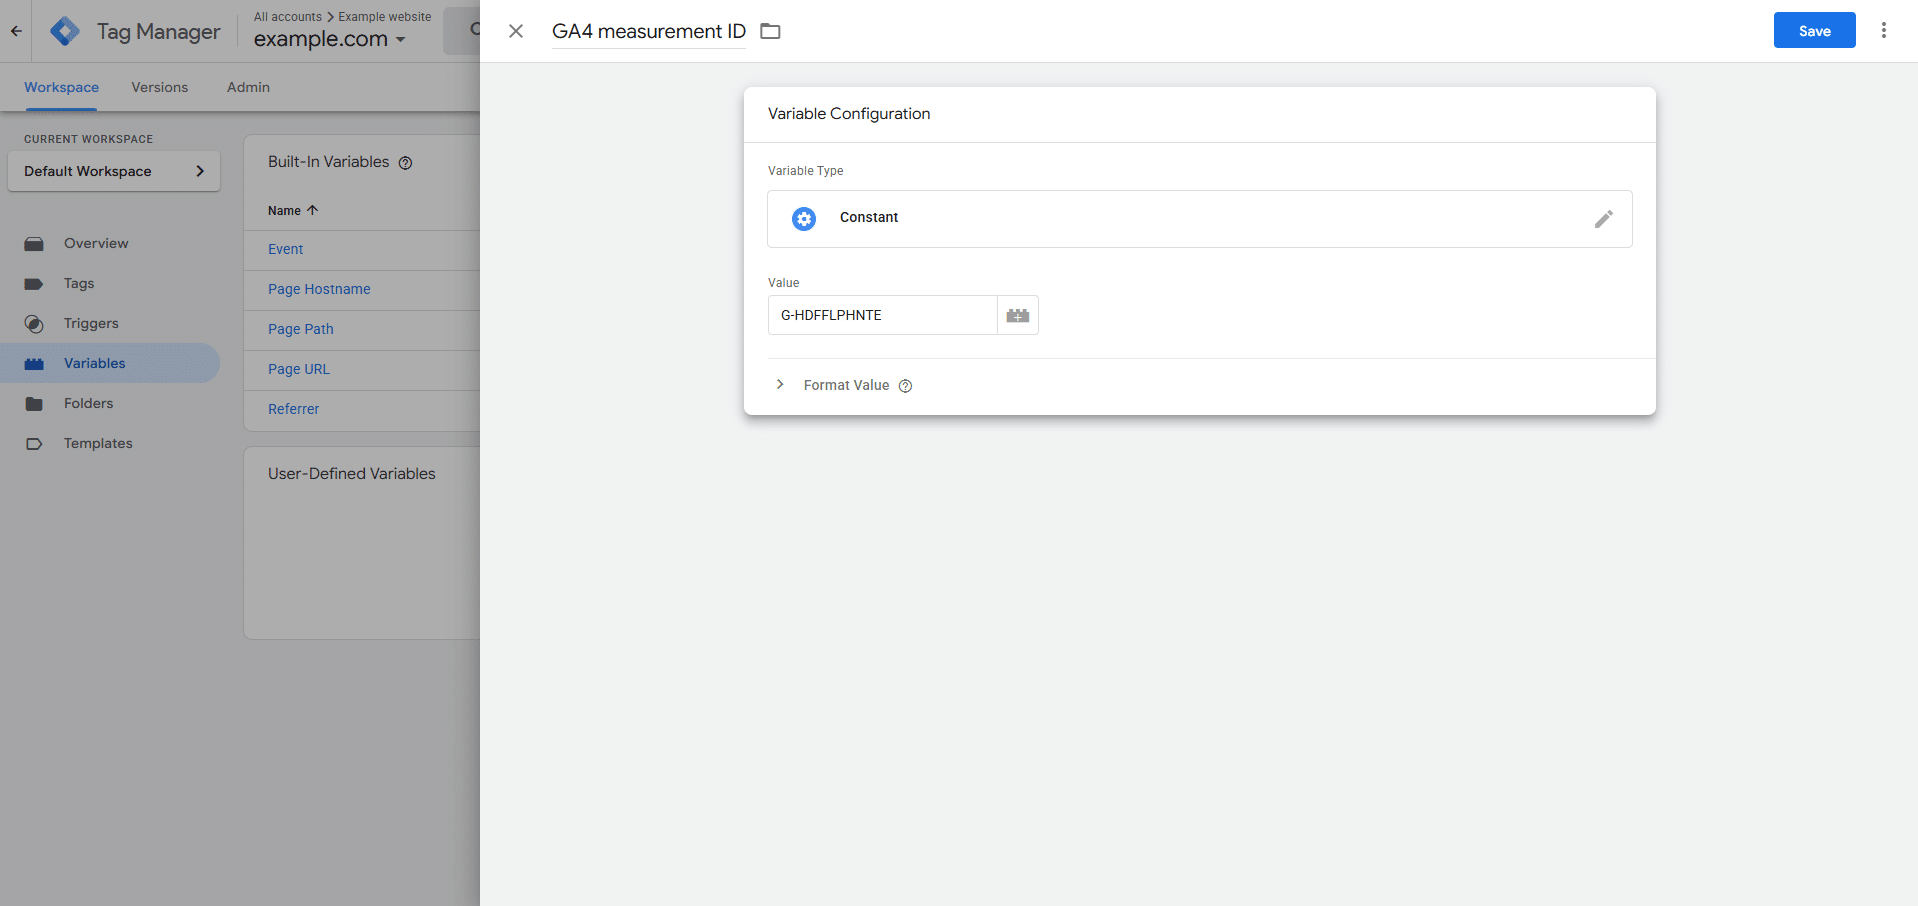
What is a Variable in Google Tag Manager?
A variable in Google Tag Manager is a placeholder which stores information and passes it to tags, triggers, and other variables within your GTM container. Variables help you make your tags dynamic by supplying data that changes based on user behaviour or website content. For example, a variable can capture a page URL, a click element, a product ID, or even a custom value that you define. For more insights see this Google help article about variables in GTM.
Need More Help?
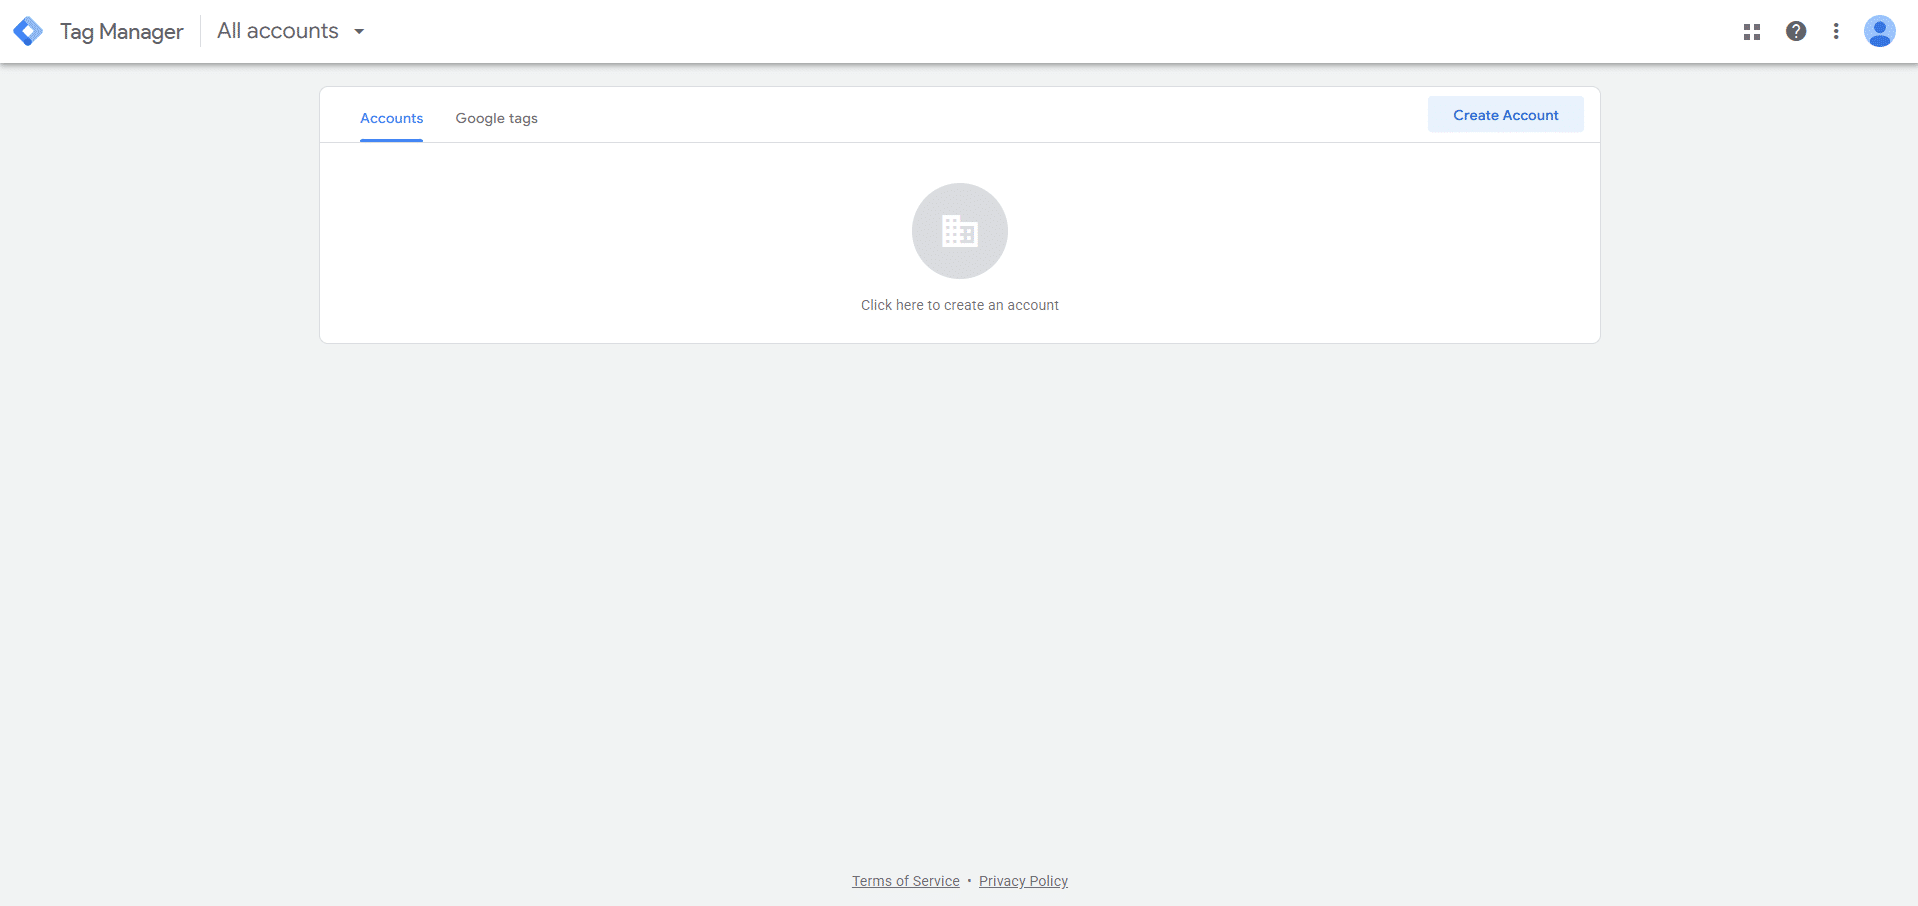
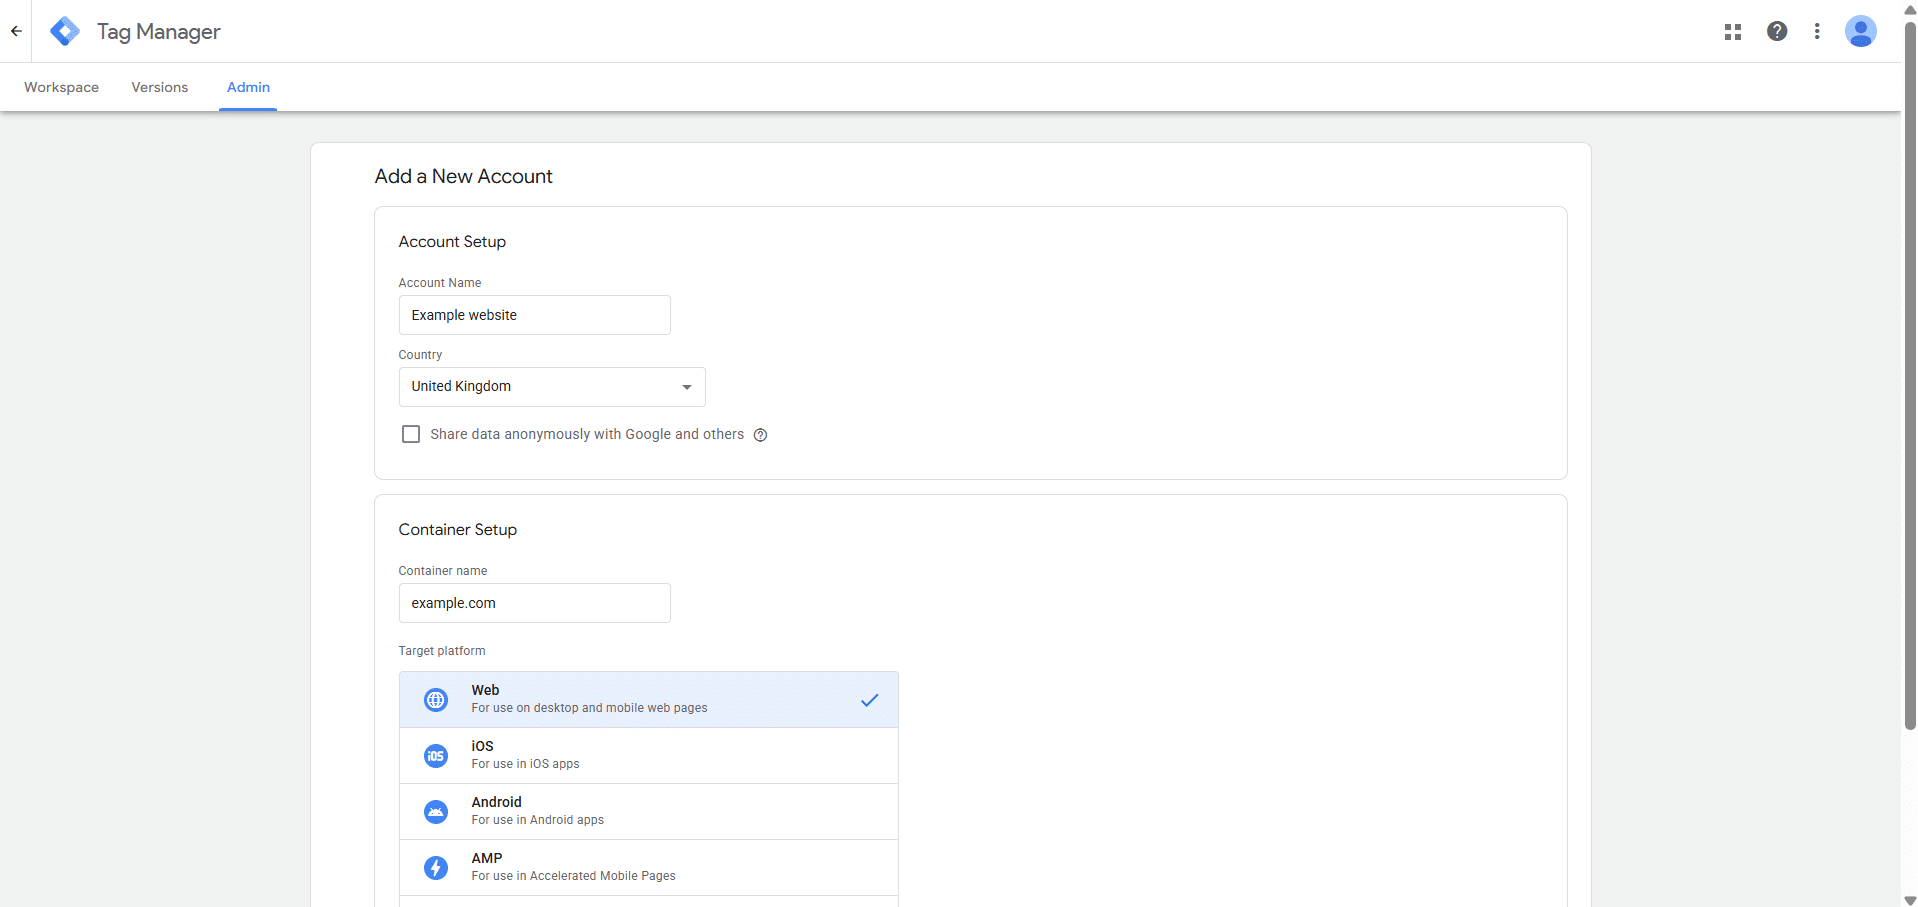
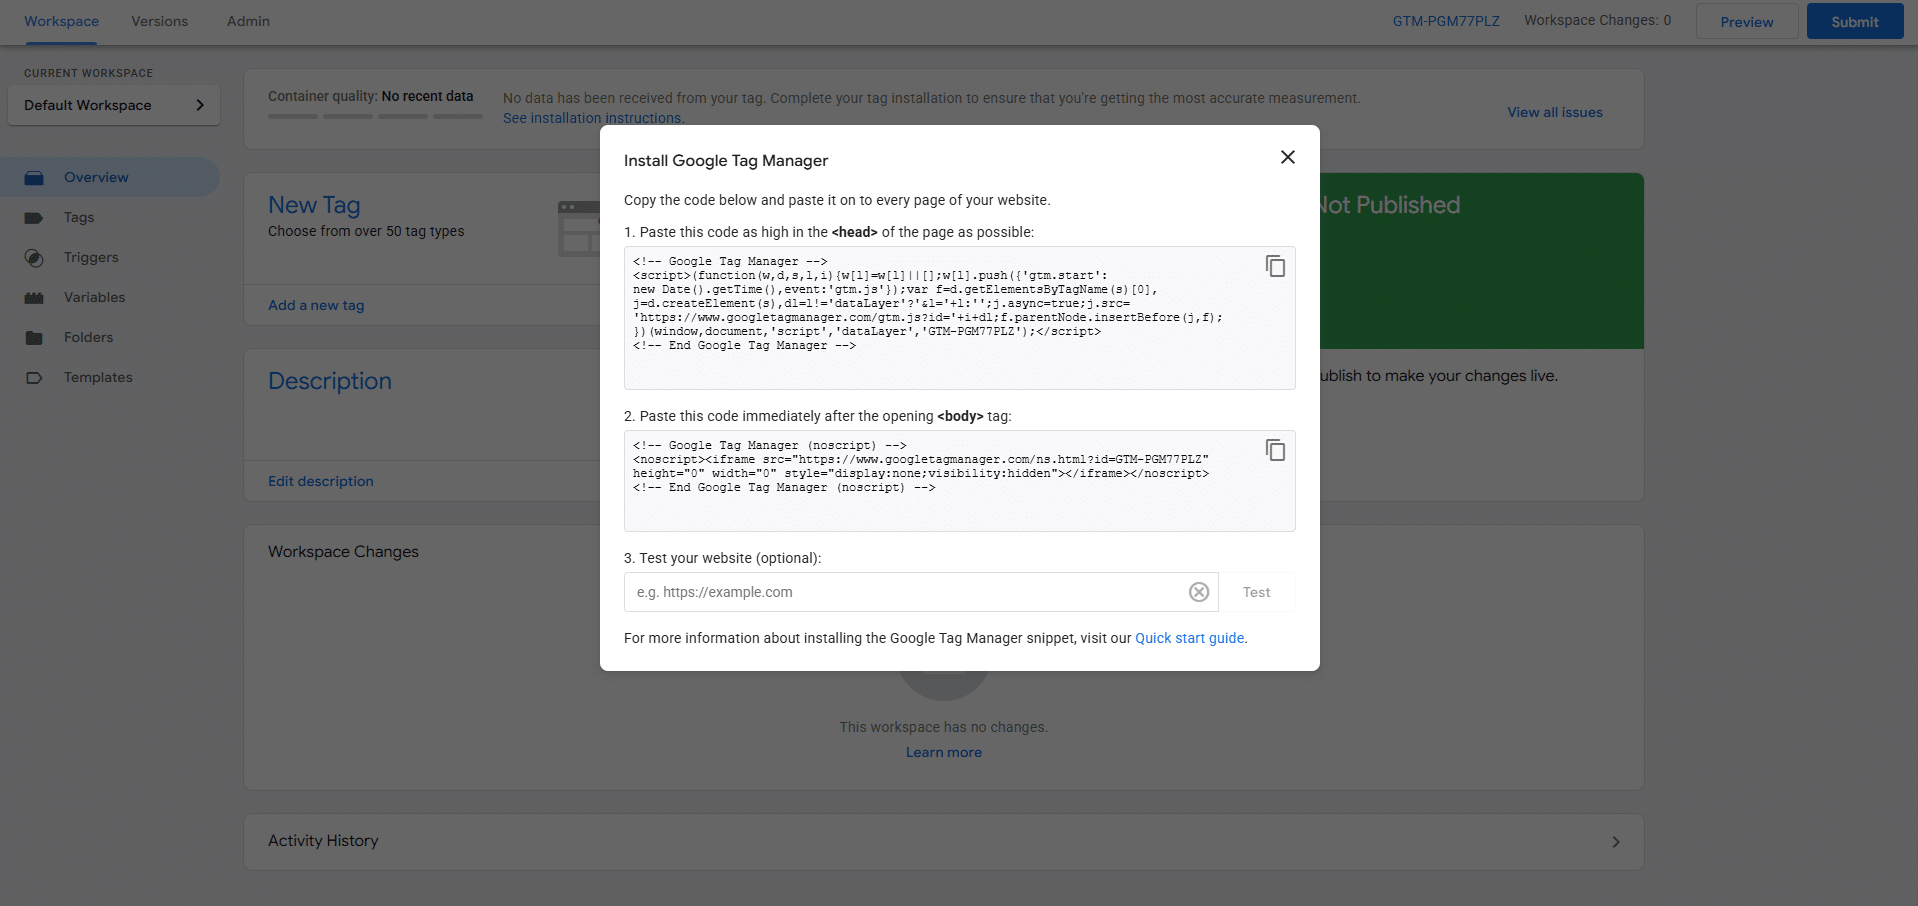
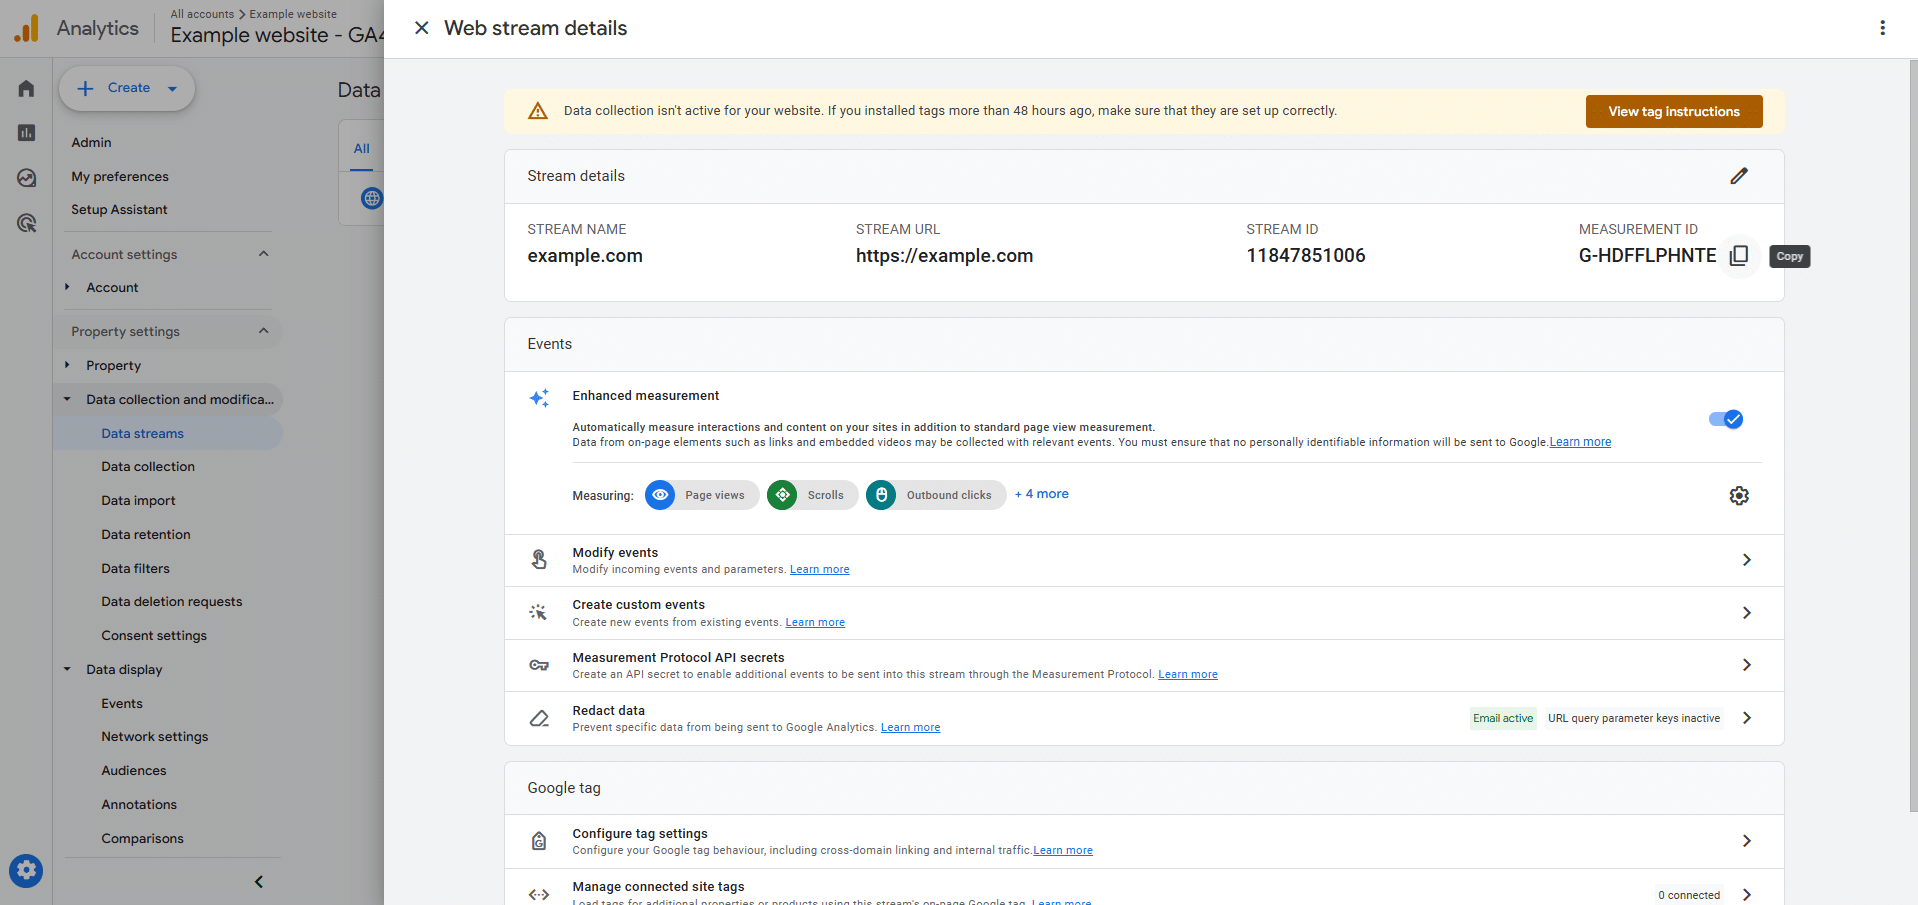
Within this article we’ve gone over the basics of both Google Analytics and Google Tag Manager, why you might need them, how they work, how to set them up and frequently asked questions. See more on Google Analytics and Google Tag Manager.
However, should you want to discuss a problem in setting up Google Analytics for your own website, or simply don’t have the time to implement the tracking yourself, please reach out to us and we’d be more than happy to help.
Give us a call on 0330 236 6568 or email sales@uclimb.co.uk, and we will be in touch to learn more about your needs!
Author
-
With over 10 years of experience, Cristian Savulescu has built a reputation as a leading SEO specialist. He has worked with globally recognised brands, including Fortune 500 companies such as John Lewis and Ralph Lauren, as well as innovative firms like Revolut and the fashion label Never Fully Dressed.
Cristian is known for delivering measurable results, combining technical expertise with strategic insight to drive traffic, conversions, and brand growth. Trusted by some of the biggest names in the industry, he consistently helps businesses achieve and maintain top search rankings.
View all posts